Do Your Own U.S. Shipping Labels From Home. I’ll Tell You How!
by Hastypearl
Hi Friends, Have you ever wished that You could do Your own Shipping Labels From Home? I know I did as I live quite a way from the nearest Post Office.
Whether You are a business woman/man, or a Grandparent wanting to ship items to your family, You can learn how to do it from home. Unless You want to ship a massive heavy item, You can do almost all of it, Yourself. It’s wonderful to do it in Your Jammies from home and save Yourself a trip to the post office. You’re welcome! : )
All You need is a Scale and that Your computer be connected to a printer. You can find shipping scales just about anywhere these days; box stores, office supply stores, just keep your eye out. They aren’t expensive. You basically just decide on how many pounds you want it to weigh for You. I purchased one AT the Post Office and it will weigh up to 10lbs. I think it was under $30. Look for the Hold feature, that allows You to put a larger than the scale item on it and it will retain the weight display after You take the package, off of the scale.
I use my shipping scale to send items to my family and my Hastypearl art and have successfully shipped, all over the world.
Follow these steps below, and before you know it, You will be a Pro! Have fun!
You will need a scale and Your computer hooked up to your Printer.
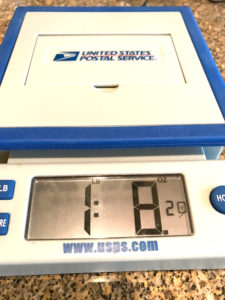
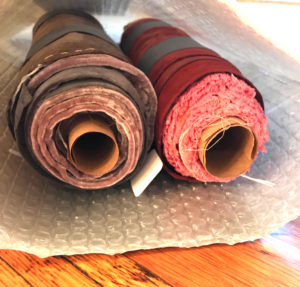
Weigh Your item and measure the package that You have placed either in your own box (grocery stores are Great places to find boxes), or one that You have either ordered from the USPS or picked up at Your local office. You might as well write it all down, because You will forget it if you don’t.
Hmm. Wonder why I knew to tell You that ? ; )
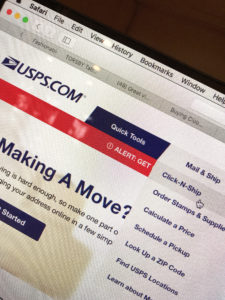
Choose Click-N-Ship
1.Register with USPS. You’ll set up a User Name and Password.
Now You can begin the process of filling out the form…
2. Where are You sending from? Make sure You check tracking. You want to be able to follow your package.
3. Where are You sending to? Make sure You notify recipient of shipping by inserting their email address.
4. Enter a shipping date.
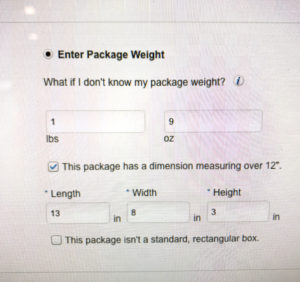
5. Enter package details. This is where You type in your package weight and size. I ALWAYS add at least 1 ounce extra just in case. Knowing that You will be adding tape to attach Your printed receipt, You need to allow for the extra weight. You can choose Flat Rate, if you have a special free USPS box/envelope for it. They are best used for heavier items. You will check the upcoming forms for price, to help You decide what is best.
6. Enter Your package value. Make sure that You include your Shipping amount, as well.
7. Select service type. Here is where You use the chart to determine if You want to use Flat Rate, Priority or First Class.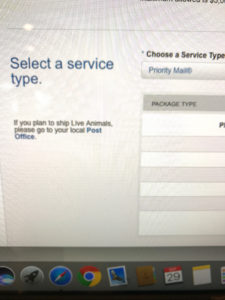
8. You can see that in my example, I selected Priority Mail for 3 Days, to my destination. Tracking comes free. Insurance was necessary because I was sending a good bit of valuable art. Some insurance will be provided, but if you want more, it’s always Your decision if You want to purchase more insurance.
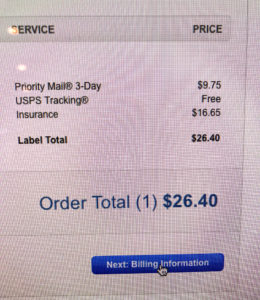
9. When you tap Billing Information, You will be led to a page where You will decide if You want to pay with a Credit Card or PayPal. I use PayPal, but it’s up to You.
10. Next, it’s time to Print Your label. I always print my label with a receipt, which I cut away and keep, in case something goes wrong. It’s important to have a history, in case you need to make a claim with the USPS. I NEVER HAVE by the way : )
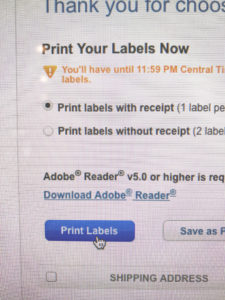
11. Here’s one last chance to check addresses and info for correctness. You are Ready to Print your label !

12. Because Your printer is hooked up to receive the info from the USPS, Your new receipt will print. I just use regular printer paper and tape my receipt to the box. I believe that you can order free from the USPS, labels with adhesive.
13. B R E A T H E ! You did it!!! Once You do a few, You will get a rhythm and will wonder why You waited so long to learn : )

In the event that Your Label doesn’t print, stay calm! Sometimes, its just that Your wifi isn’t picking things up and it will print. If it doesn’t, You can always go to Your Credit Card or PapPal account and void the transaction and retry. I have only had to do that once in many shippings. I just wanted to tell You, so that You know that there is a plan for recovery.
Also, when something measures less than 1 inch in height, You still have to type 1 inch. There isn’t any provision for less and there aren’t provisions for half inches, so just round up.
Of course, You can ship Internationally. Along the way, You will be asked to fill out a special form that will be included when You print Your label. These items must be taken to the Post Office to drop off.
Along the way, there will be an option to have Your item picked up by Your carrier, from Your home. That’s actually very nice. I have a great relationship with my carrier and she happily works with me. Maybe it’s the chocolates that I put in our box for her, every now and then ; )
I hope I didn’t leave anything out. It’s really just following the steps that the USPS lays out. I can’t wait to hear about Your first experience!
*
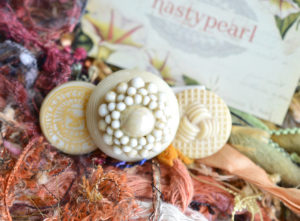
On the Hastypearl front, You KNOW that I love all things vintage, and that shows up in all of my art. I love looking for the BEST vintage buttons and configuring them into Brooches. I have these two well priced brooches, listed in my Hastypearl Shop. You can read all about my construction process and I hope you will choose one for Yourself and someone that You love.
![]()
*
I’m so happy that you stopped by Hastypearl.
I love to have conversations about Life and Art.
I would love to hear what You are working on or dreaming about. All of our lives are so interesting and different!
Please join those that follow Hastypearl, by subscribing on your right.
I’ll be back very soon! Best Best to YOU! Laura aka Hastypearl
