Easy Book Binding Technique
Hastypearl
Bookbinding. What a world ! There’s an endless amount of Book Binding Technique stitch choices out there. Some are so complicated, that even holding your tongue just right, doesn’t help ; )
Short of using a stapler, what I’m going to show you how to do…The Pamphlet Stitch…has got to be one of the easiest stitch choices out there. If you think ahead, you can not only have a simple time of it, but also a really pretty look, as well. Follow along, and this Easy Book Binding Technique tutorial, will have your pages put together, in no time.
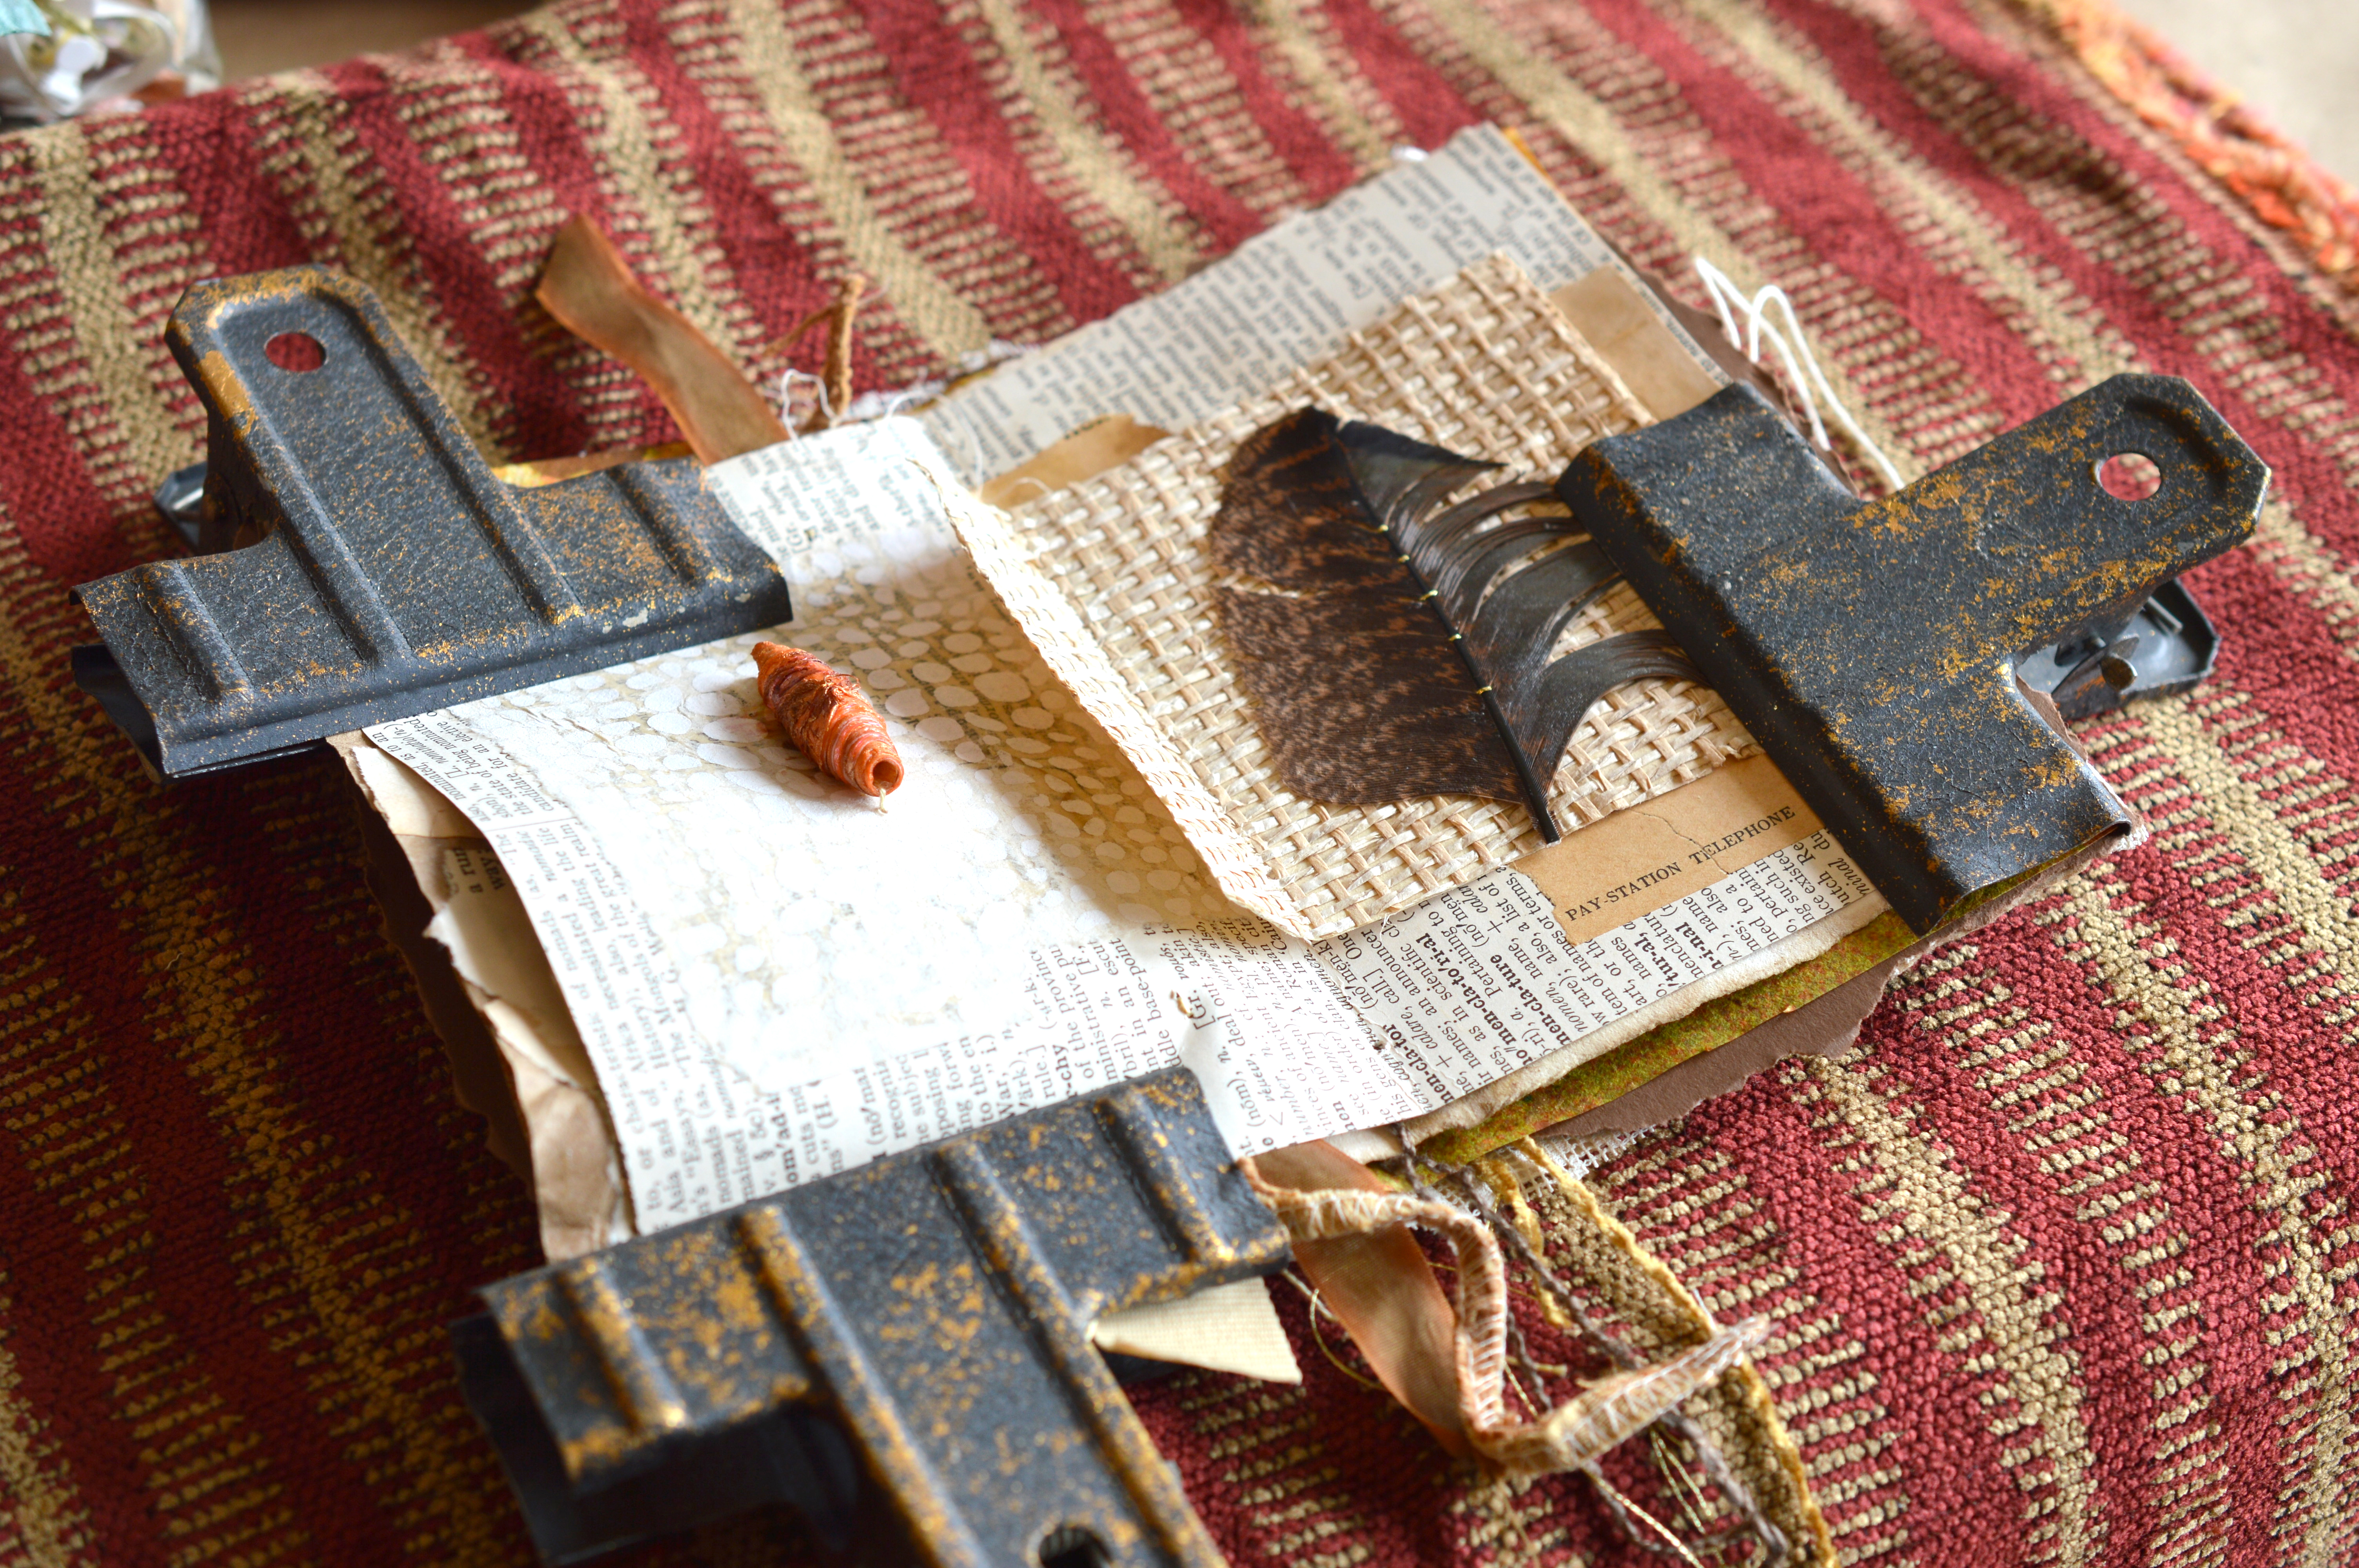
Friends, Leslie Marsh and Roxanne Evans Staudt taught me to use large clips, to hold my Mixed Media stuffed pages together, while book binding.
There isn’t any way that my fumbly fingers are going to successfully hold all of my full pages perfectly in place and why would I want to torture myself trying, when the clips are so great.
Just stack everything up like you want and use your clips.
One of my favorite things to do in book binding, is to get out all of my Waxed Linen Threads and decide which color I like best. Maybe I will even do some bead, ribbon or charm gathering. It’s a great time to decide how you want to adorn your book.
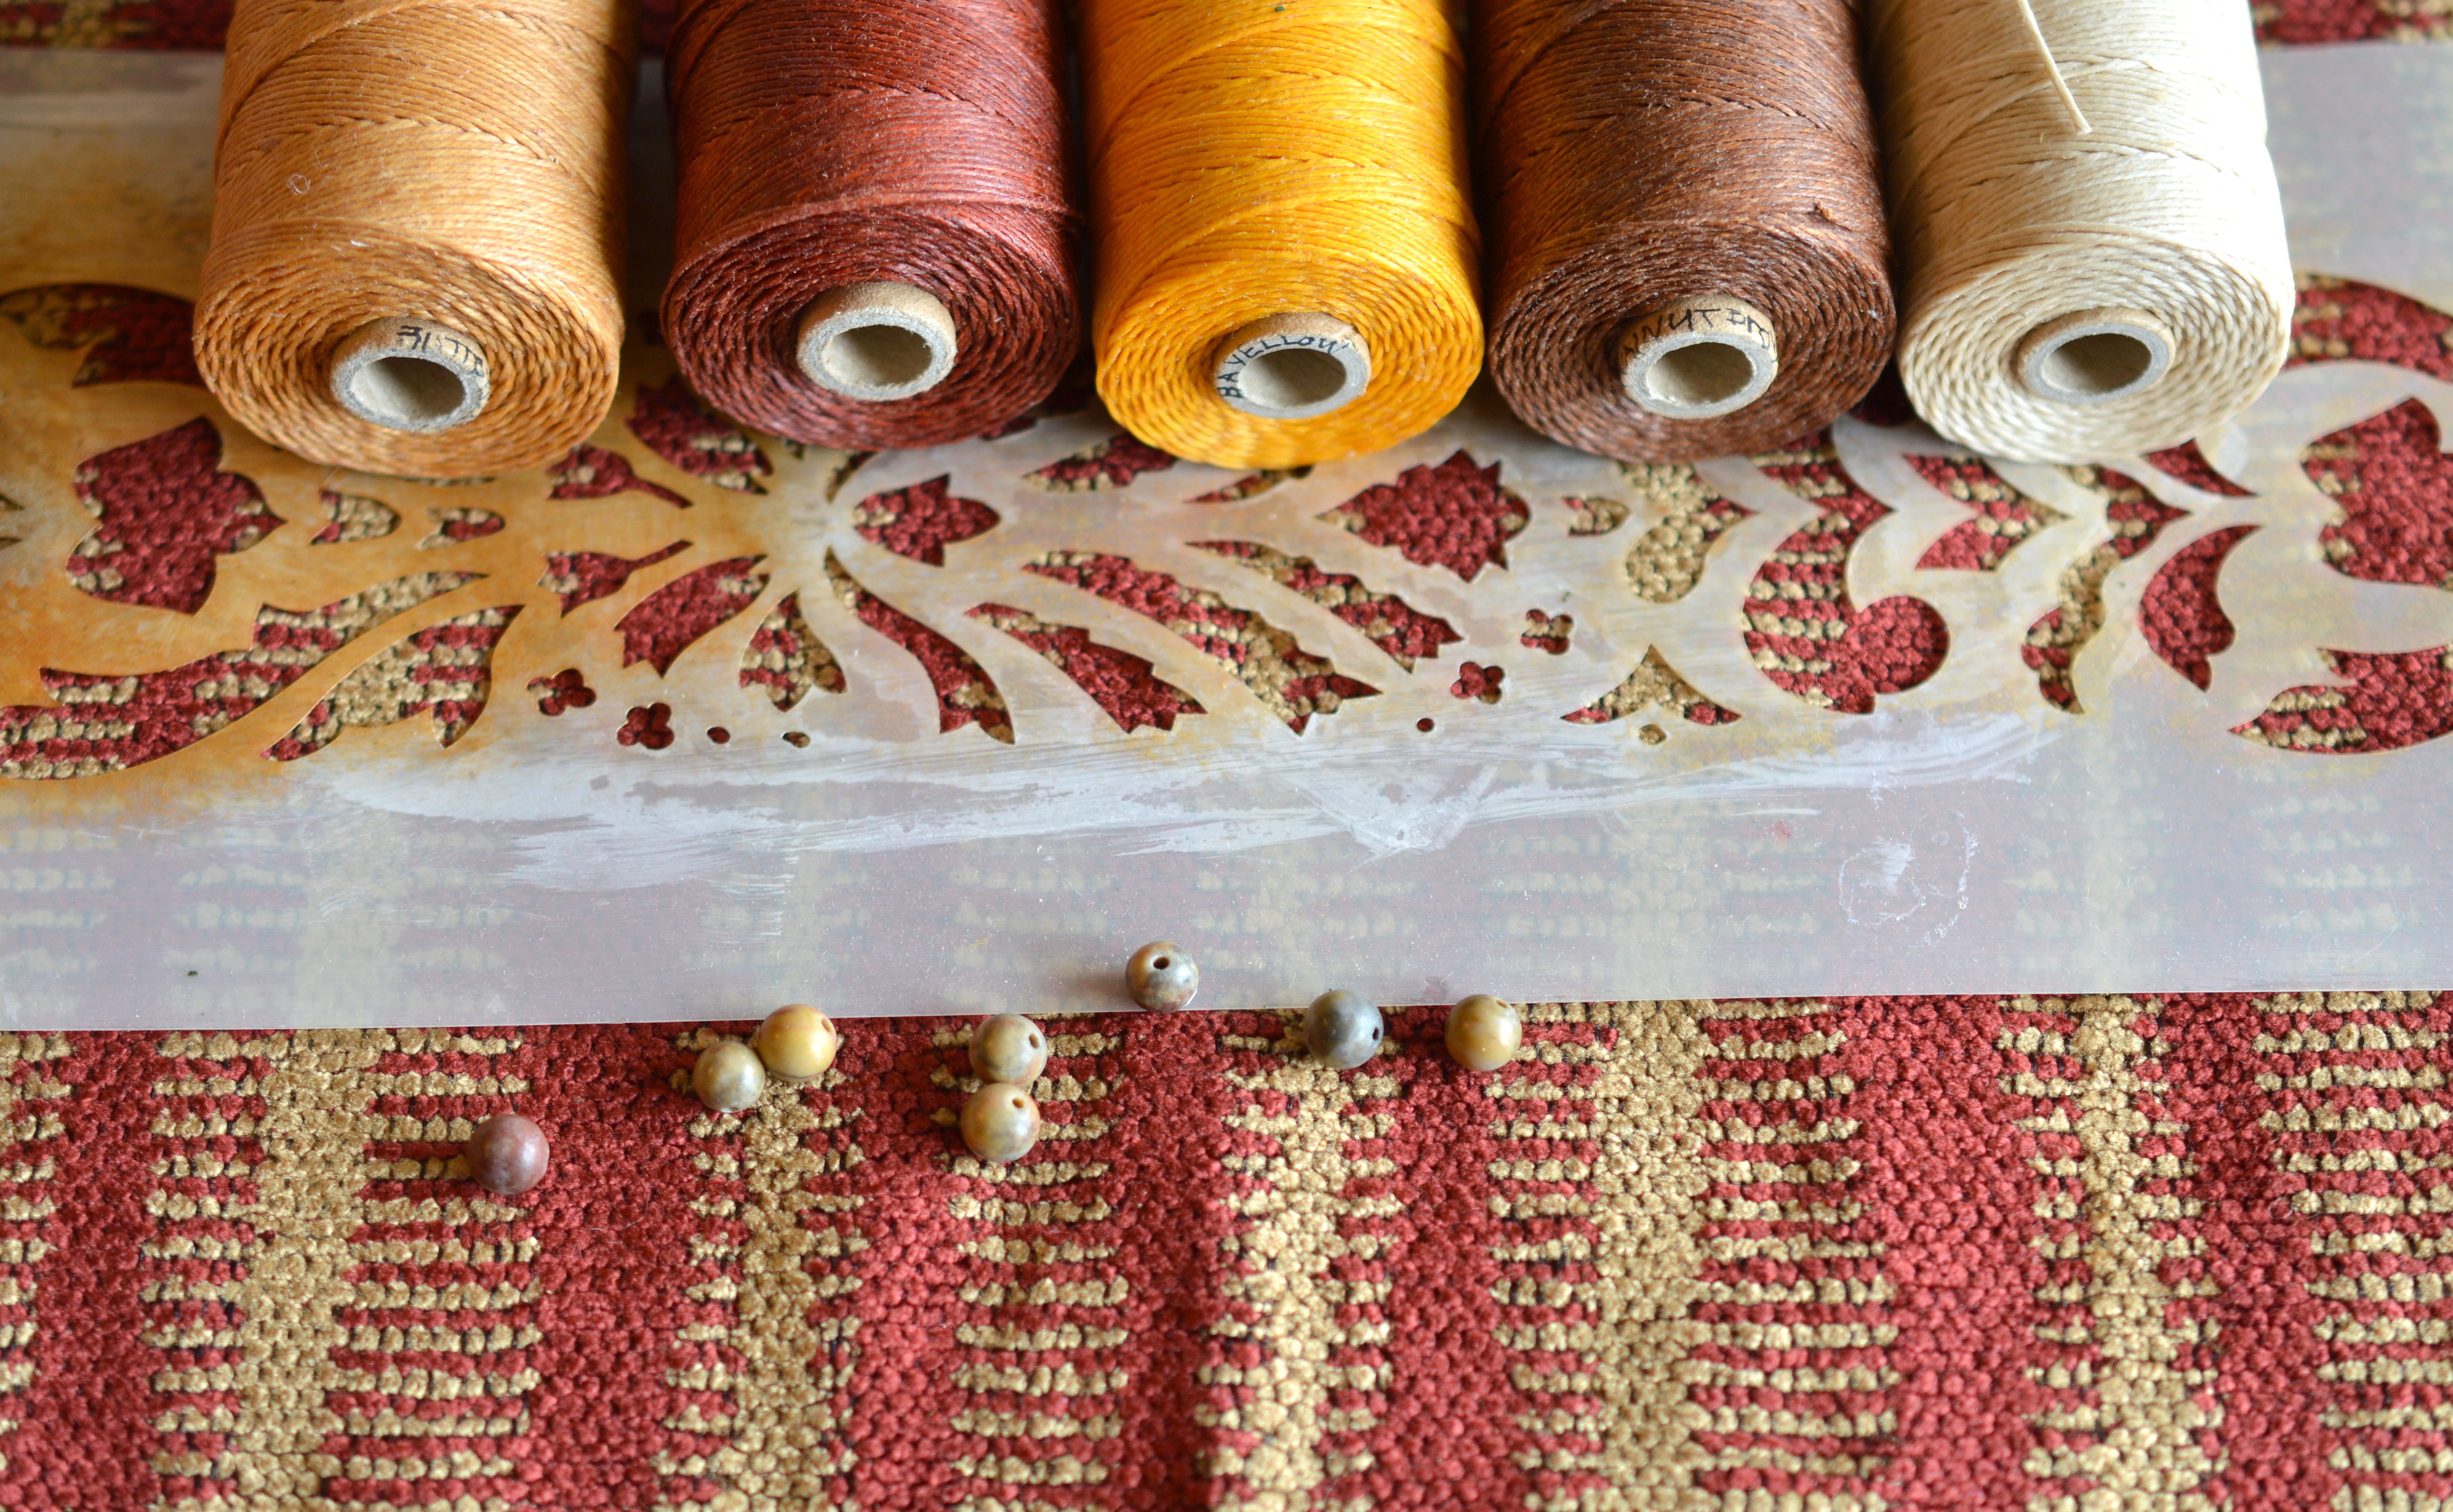

You could almost predict it. I love the colors of fall leaves and rust was going to look Great, with this piece.
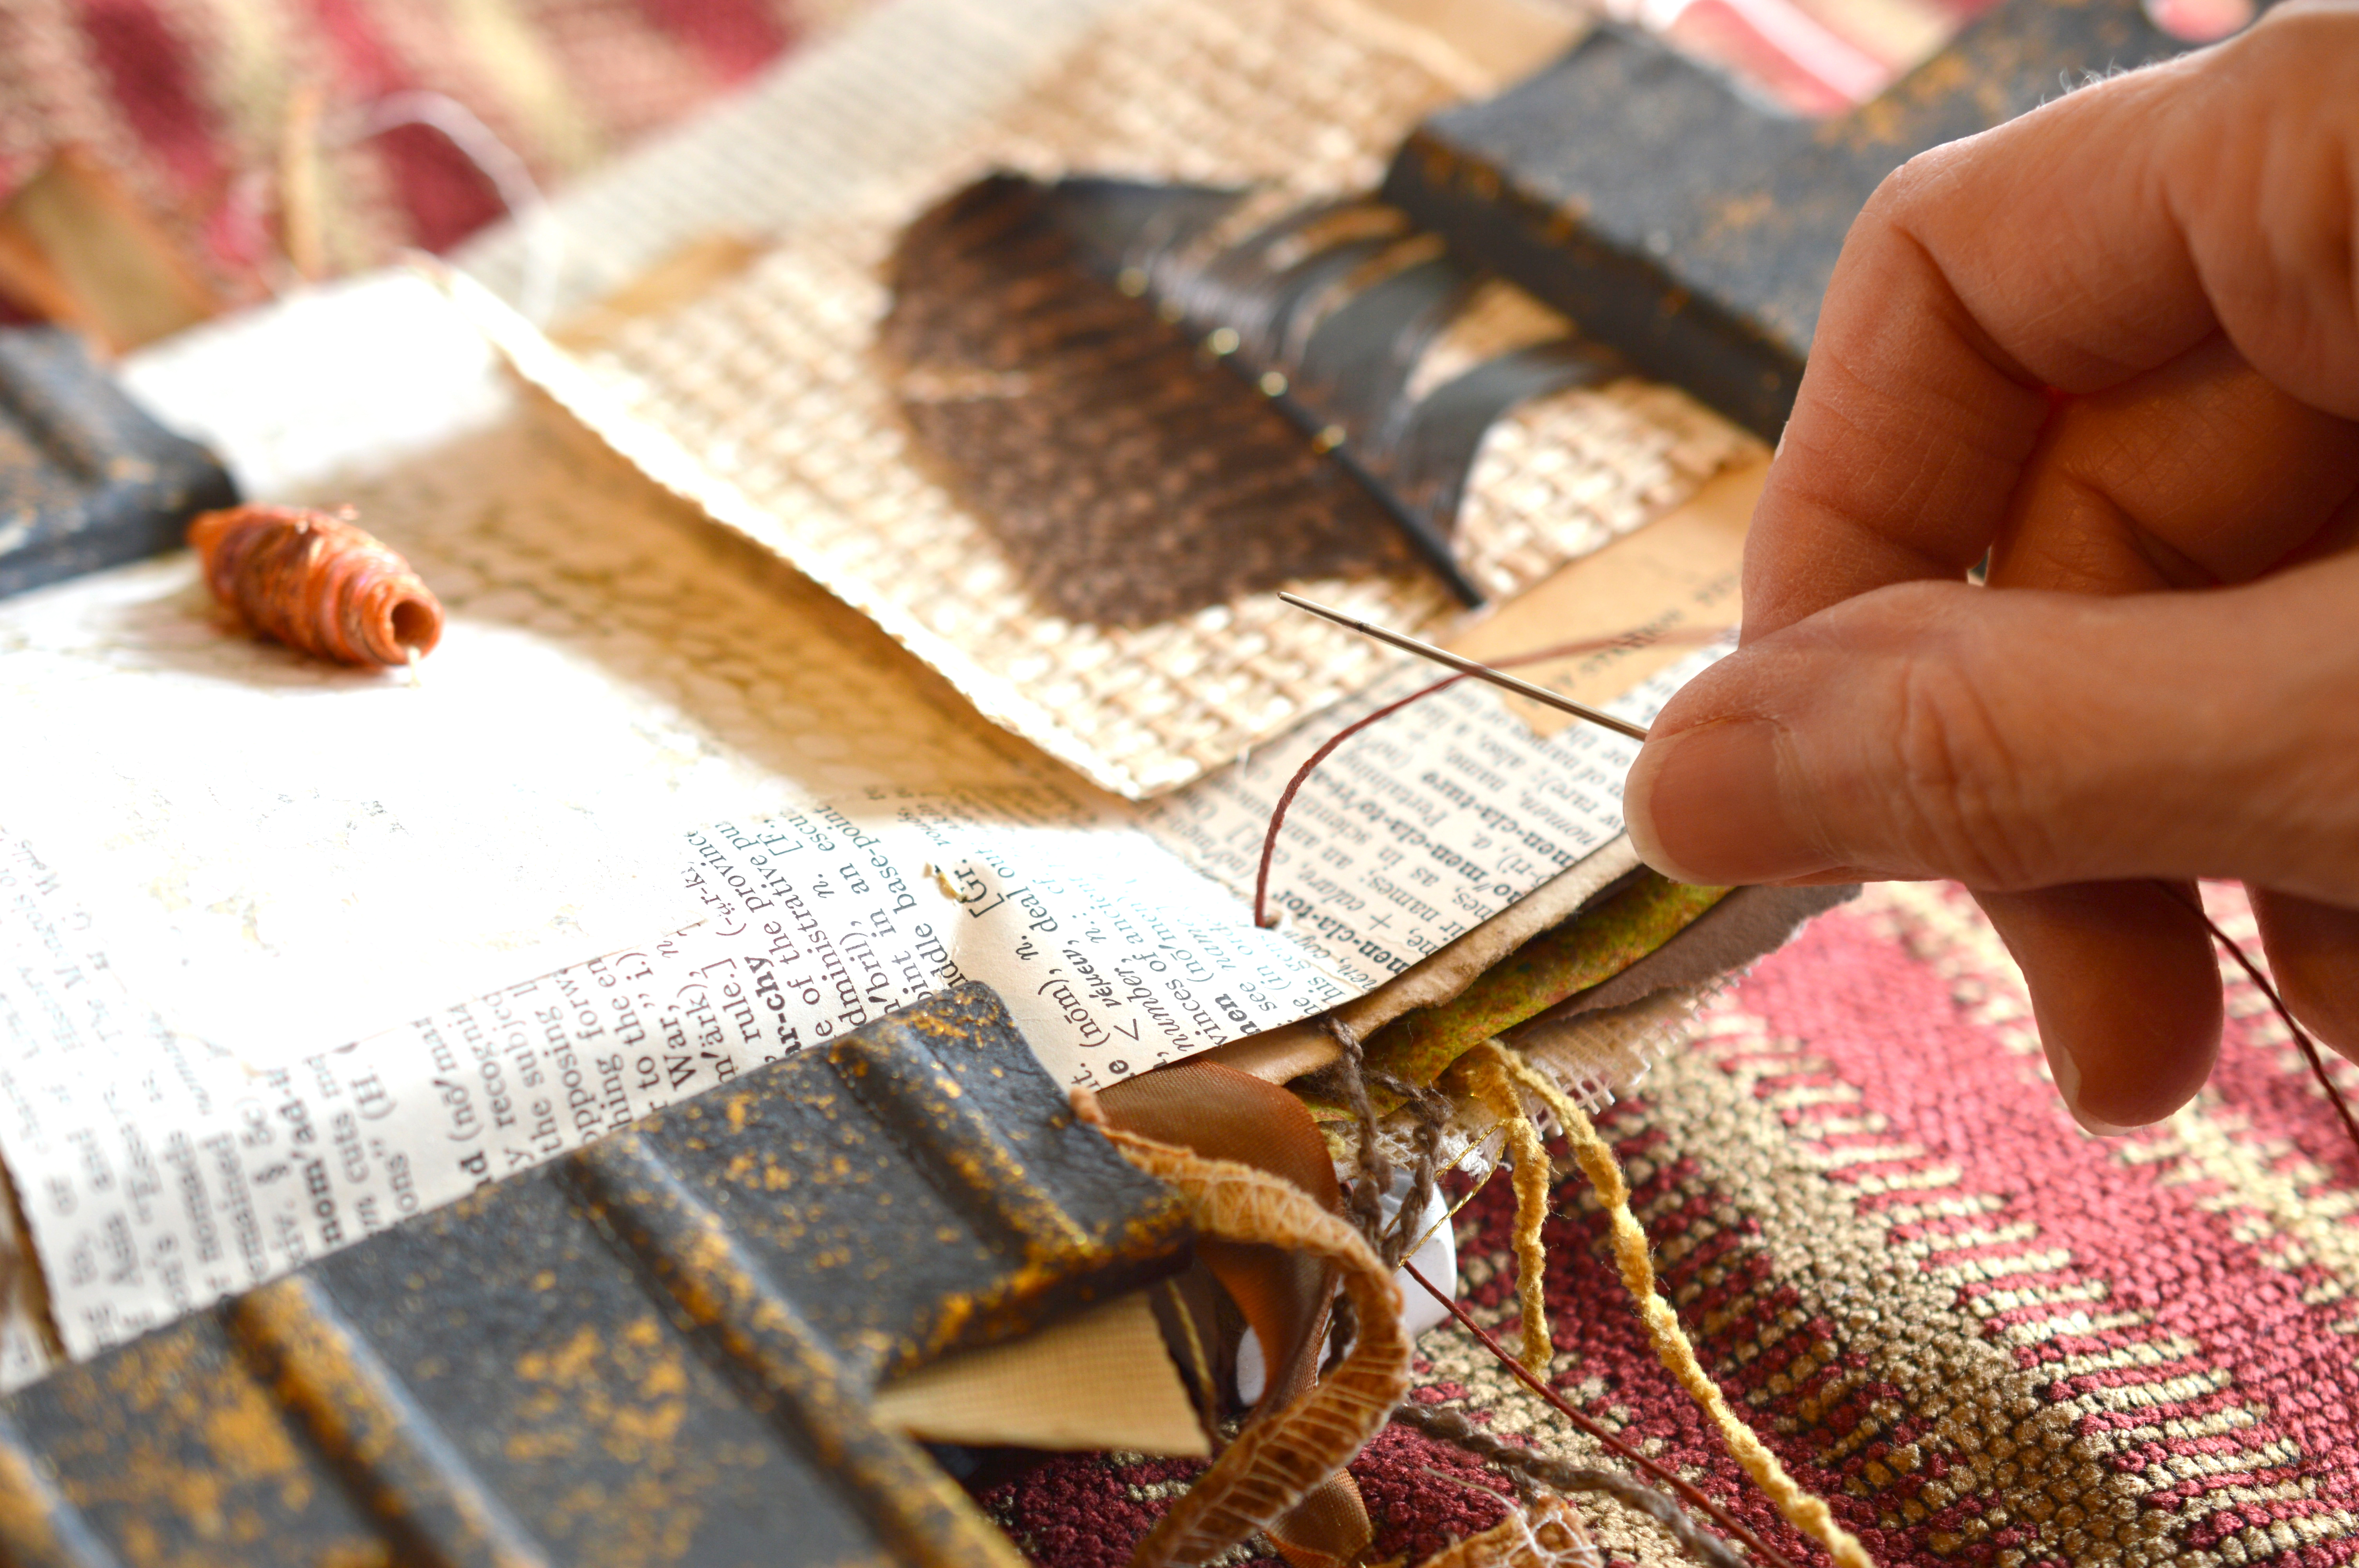
Think about where you want your holes to fall on your pages. Make sure that any smaller signature pages will have holes in them. Precise people might want to measure and divide evenly. I’m kind of a “look over the end of my thumb” kind of measurer, so I usually freestyle measure. I do think however, what end I want to Start and End with. For this book, four was a good number of holes for me. I wanted to end on the bottom, so I thought I would start on the inside, work my way up, then flip the book over at the top, work my way back down and finish on the outside. Punch through all of the pages with your awl. These holes are called, stations. #1 is at the top, #4 at the bottom.
Cut a goodly length of thread. I was taught that if you make a length of thread up one side and fold it over for the other side, you will have plenty. Especially for the Pamphlet Stitch. I like to have long tails hanging afterwards, so I cut my thread even longer. Thread is cheap. You DON’T want to get almost done, and not have enough thread. This isn’t a time to conserve. You can always use the leftover thread, for another project.
To get started, on the inside station #4 hole that you punched with your awl, push your large threaded needle in the bottom, inside hole. Take a look as you are pushing it through, to see where it will come out the other side. With your clips safely in place, its quite reliable that the needle will come right through on the other side. Make sure that you leave, a good long tail.
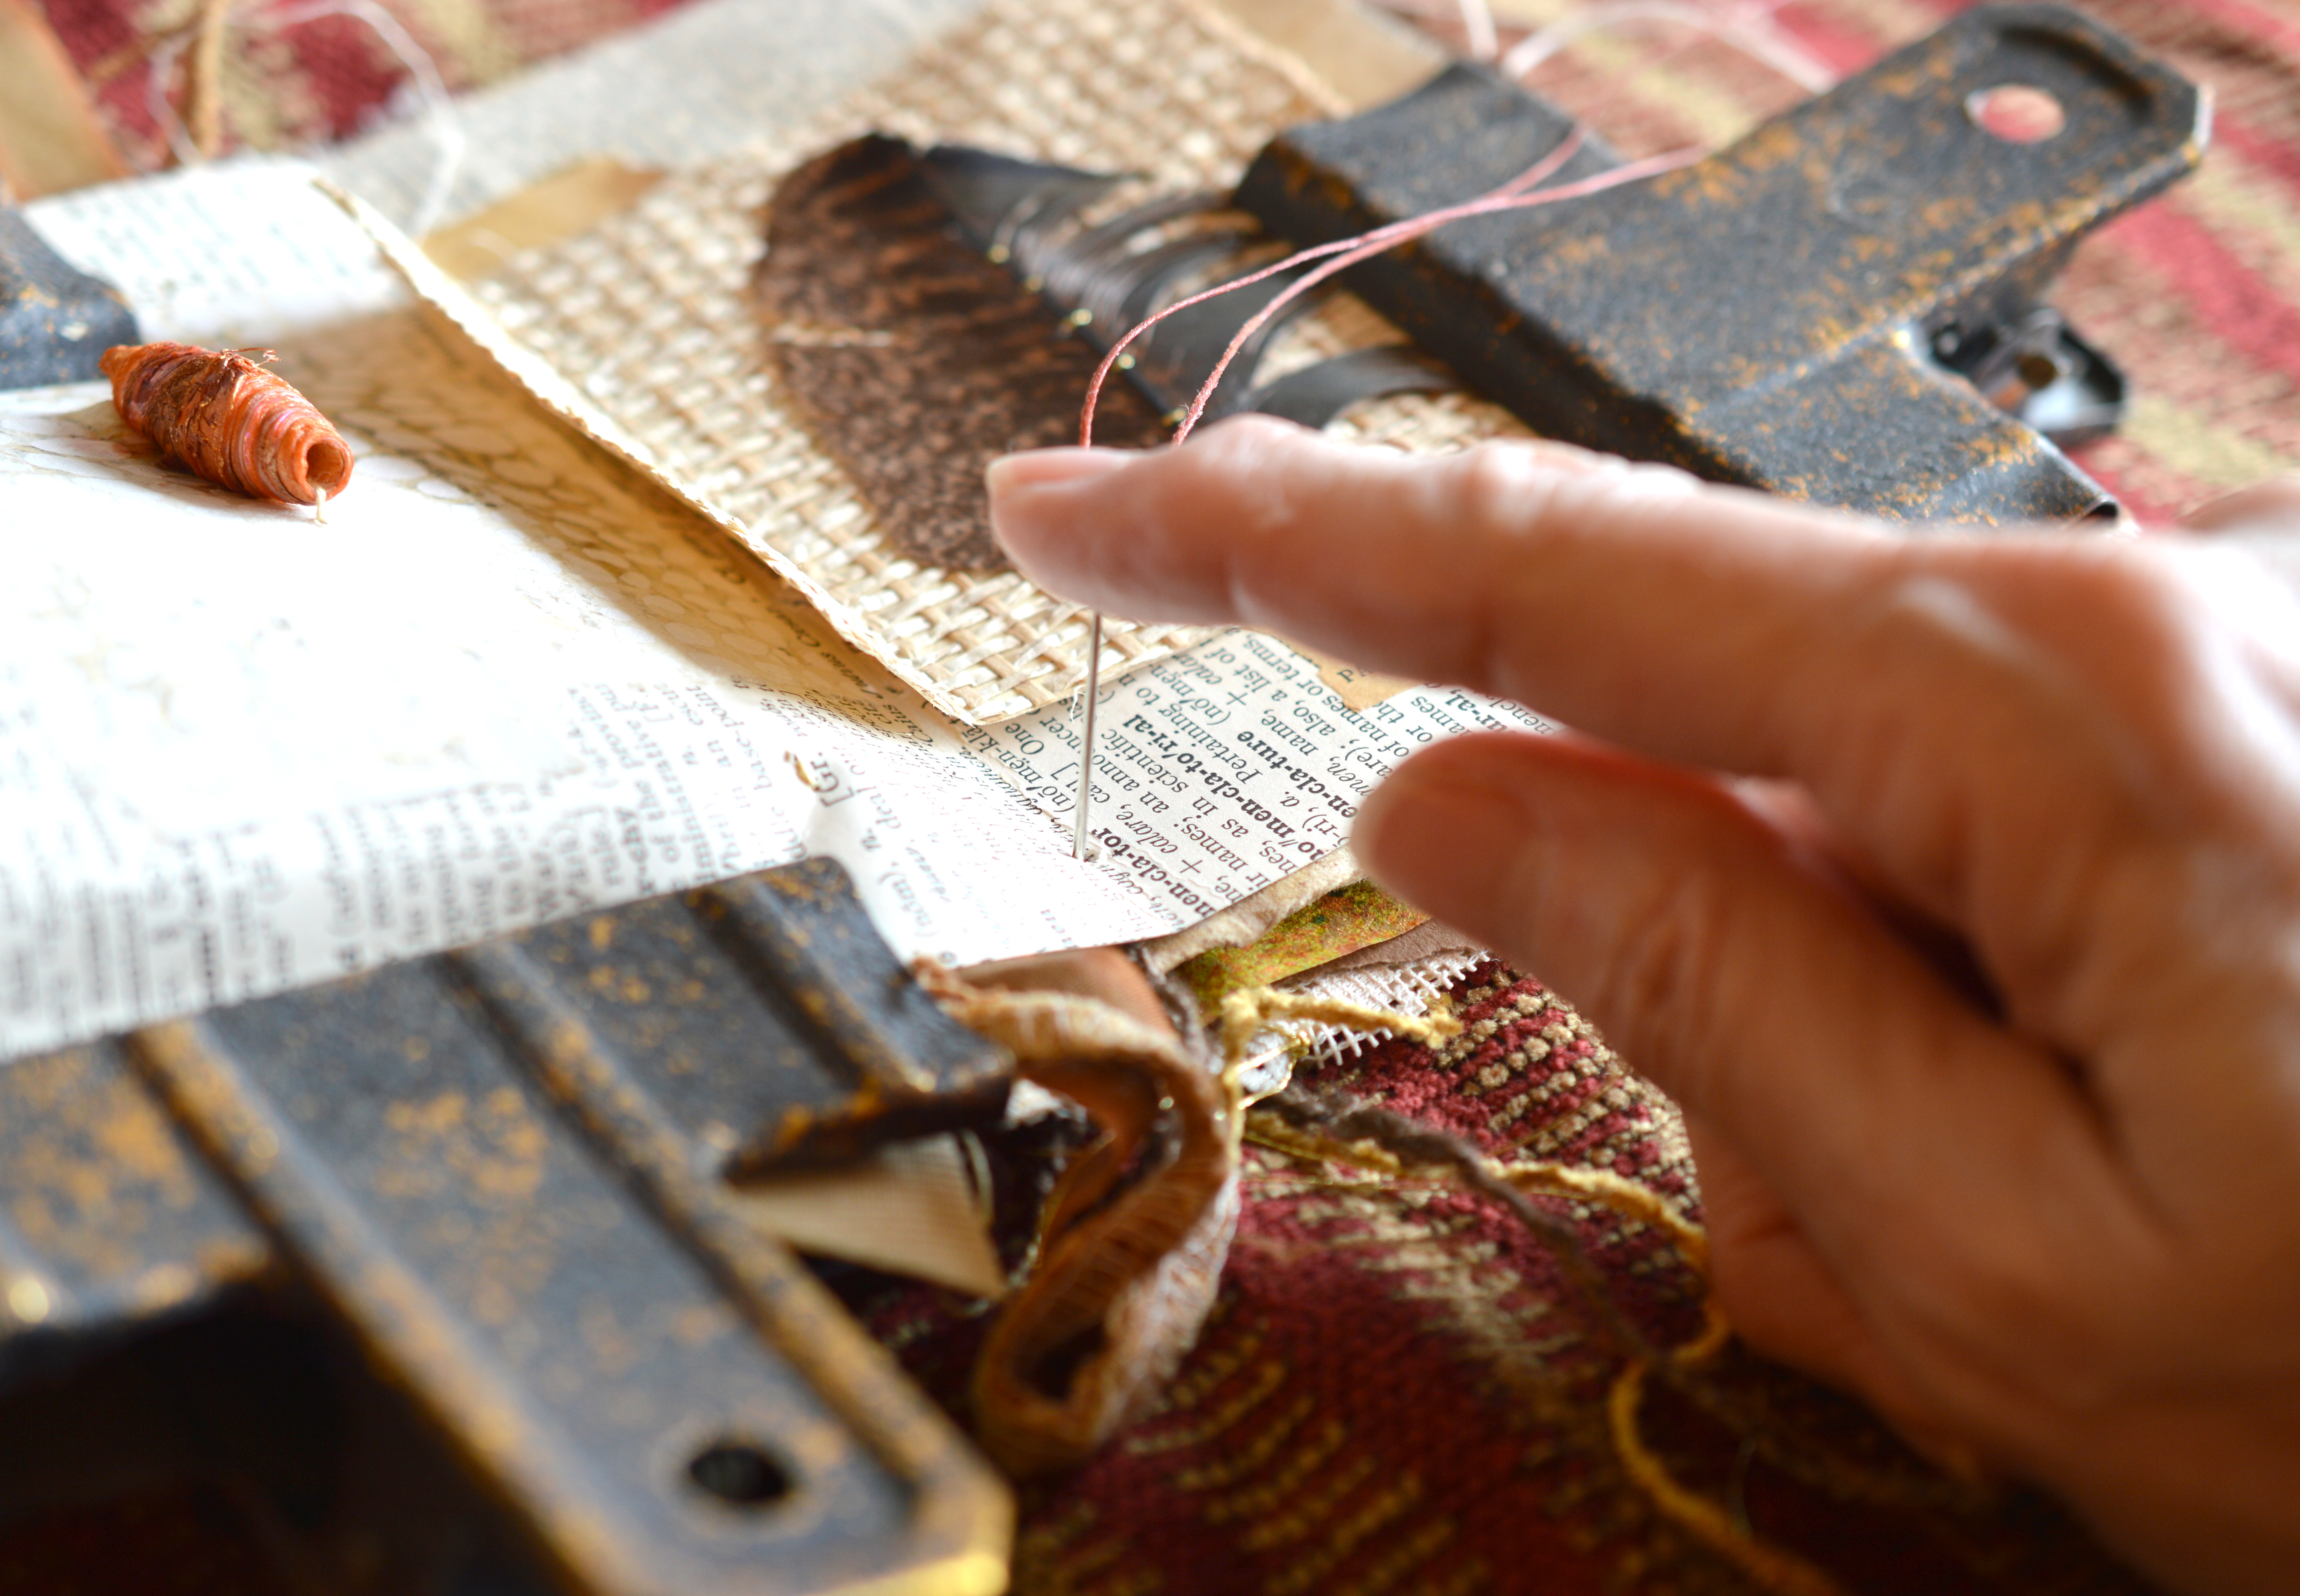
Now, it gets quite fun! You just keep going in and out of your pre-punched stations/holes with your thread. Make sure that you give it a good tug after every hole. The Waxed Thread is strong, so don’t be afraid that it will break. You want your book to be bound, Good and Tight.

When you get to your top hole, station #1, just flip your book over to the other side and start back down the holes. You will have gone through all of the holes from the front side, but there will be plenty of room to go in, again.


When you get back down to the bottom station #4, it will mean that you have gone in and out of every hole, twice. With your good strong tugs, the book will be very solidly bound. Some people like to start at the top, or in the middle. There is No right or wrong, there is Only the way that You, want to do it : )
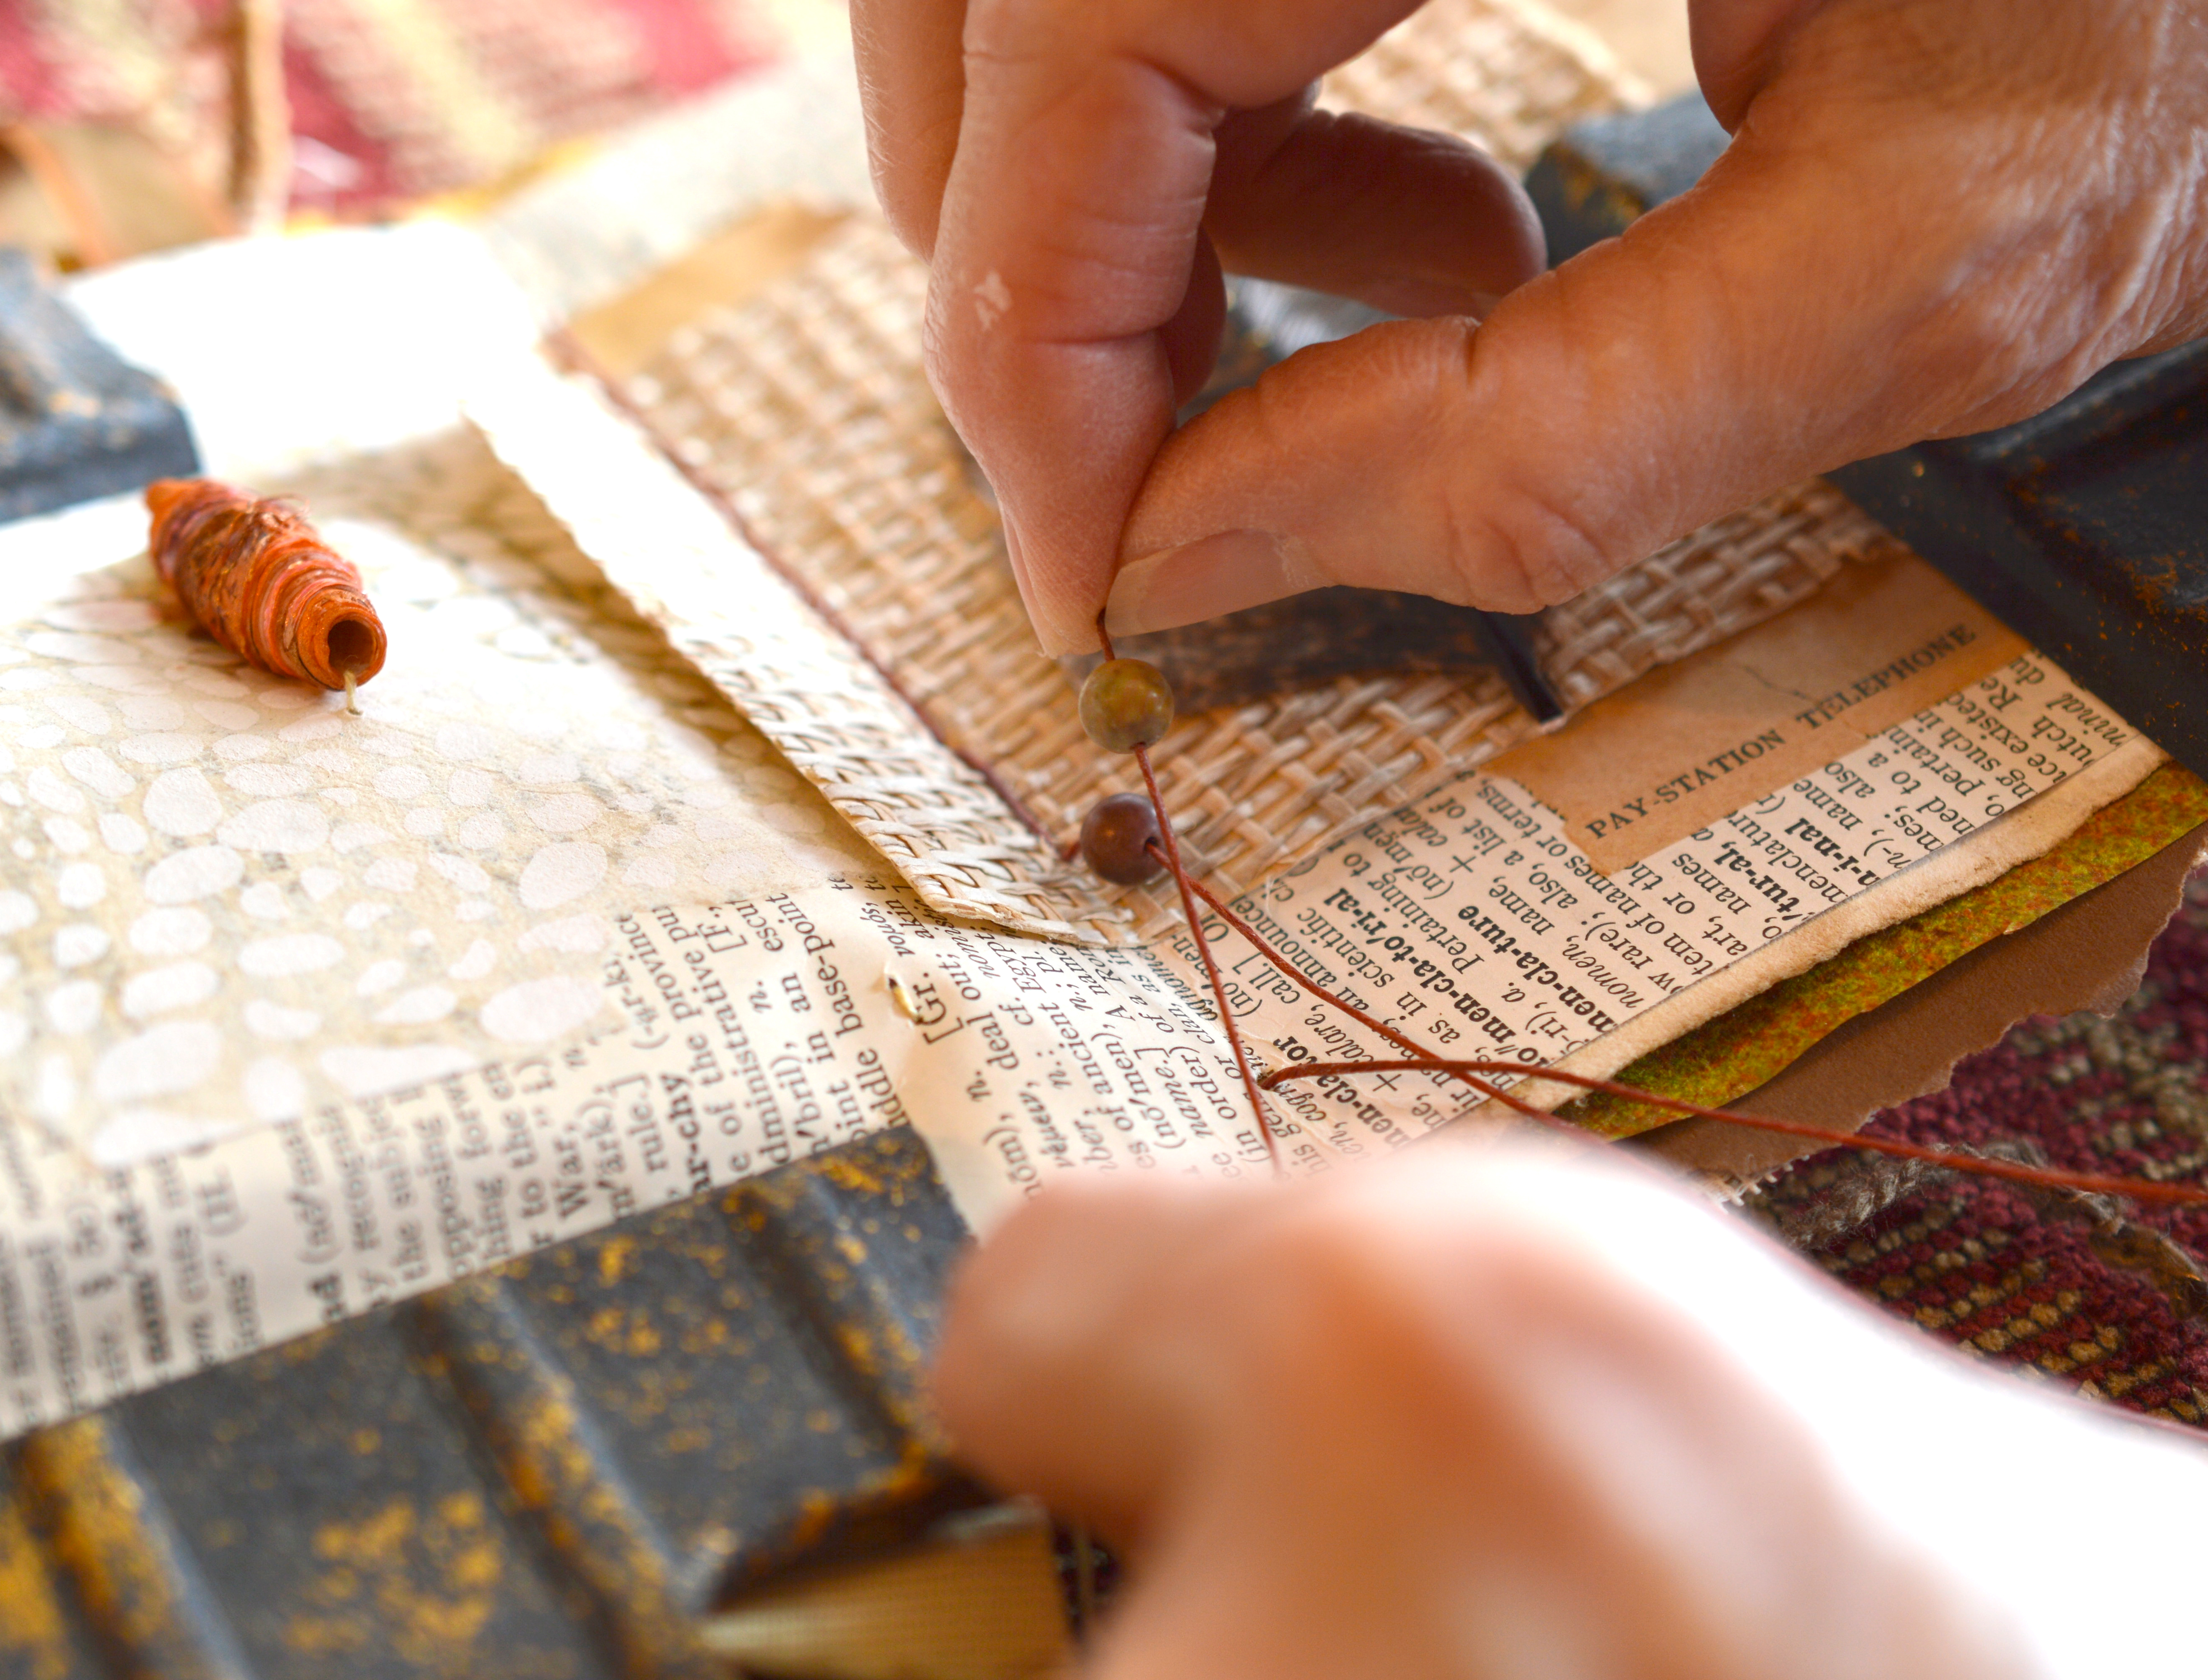
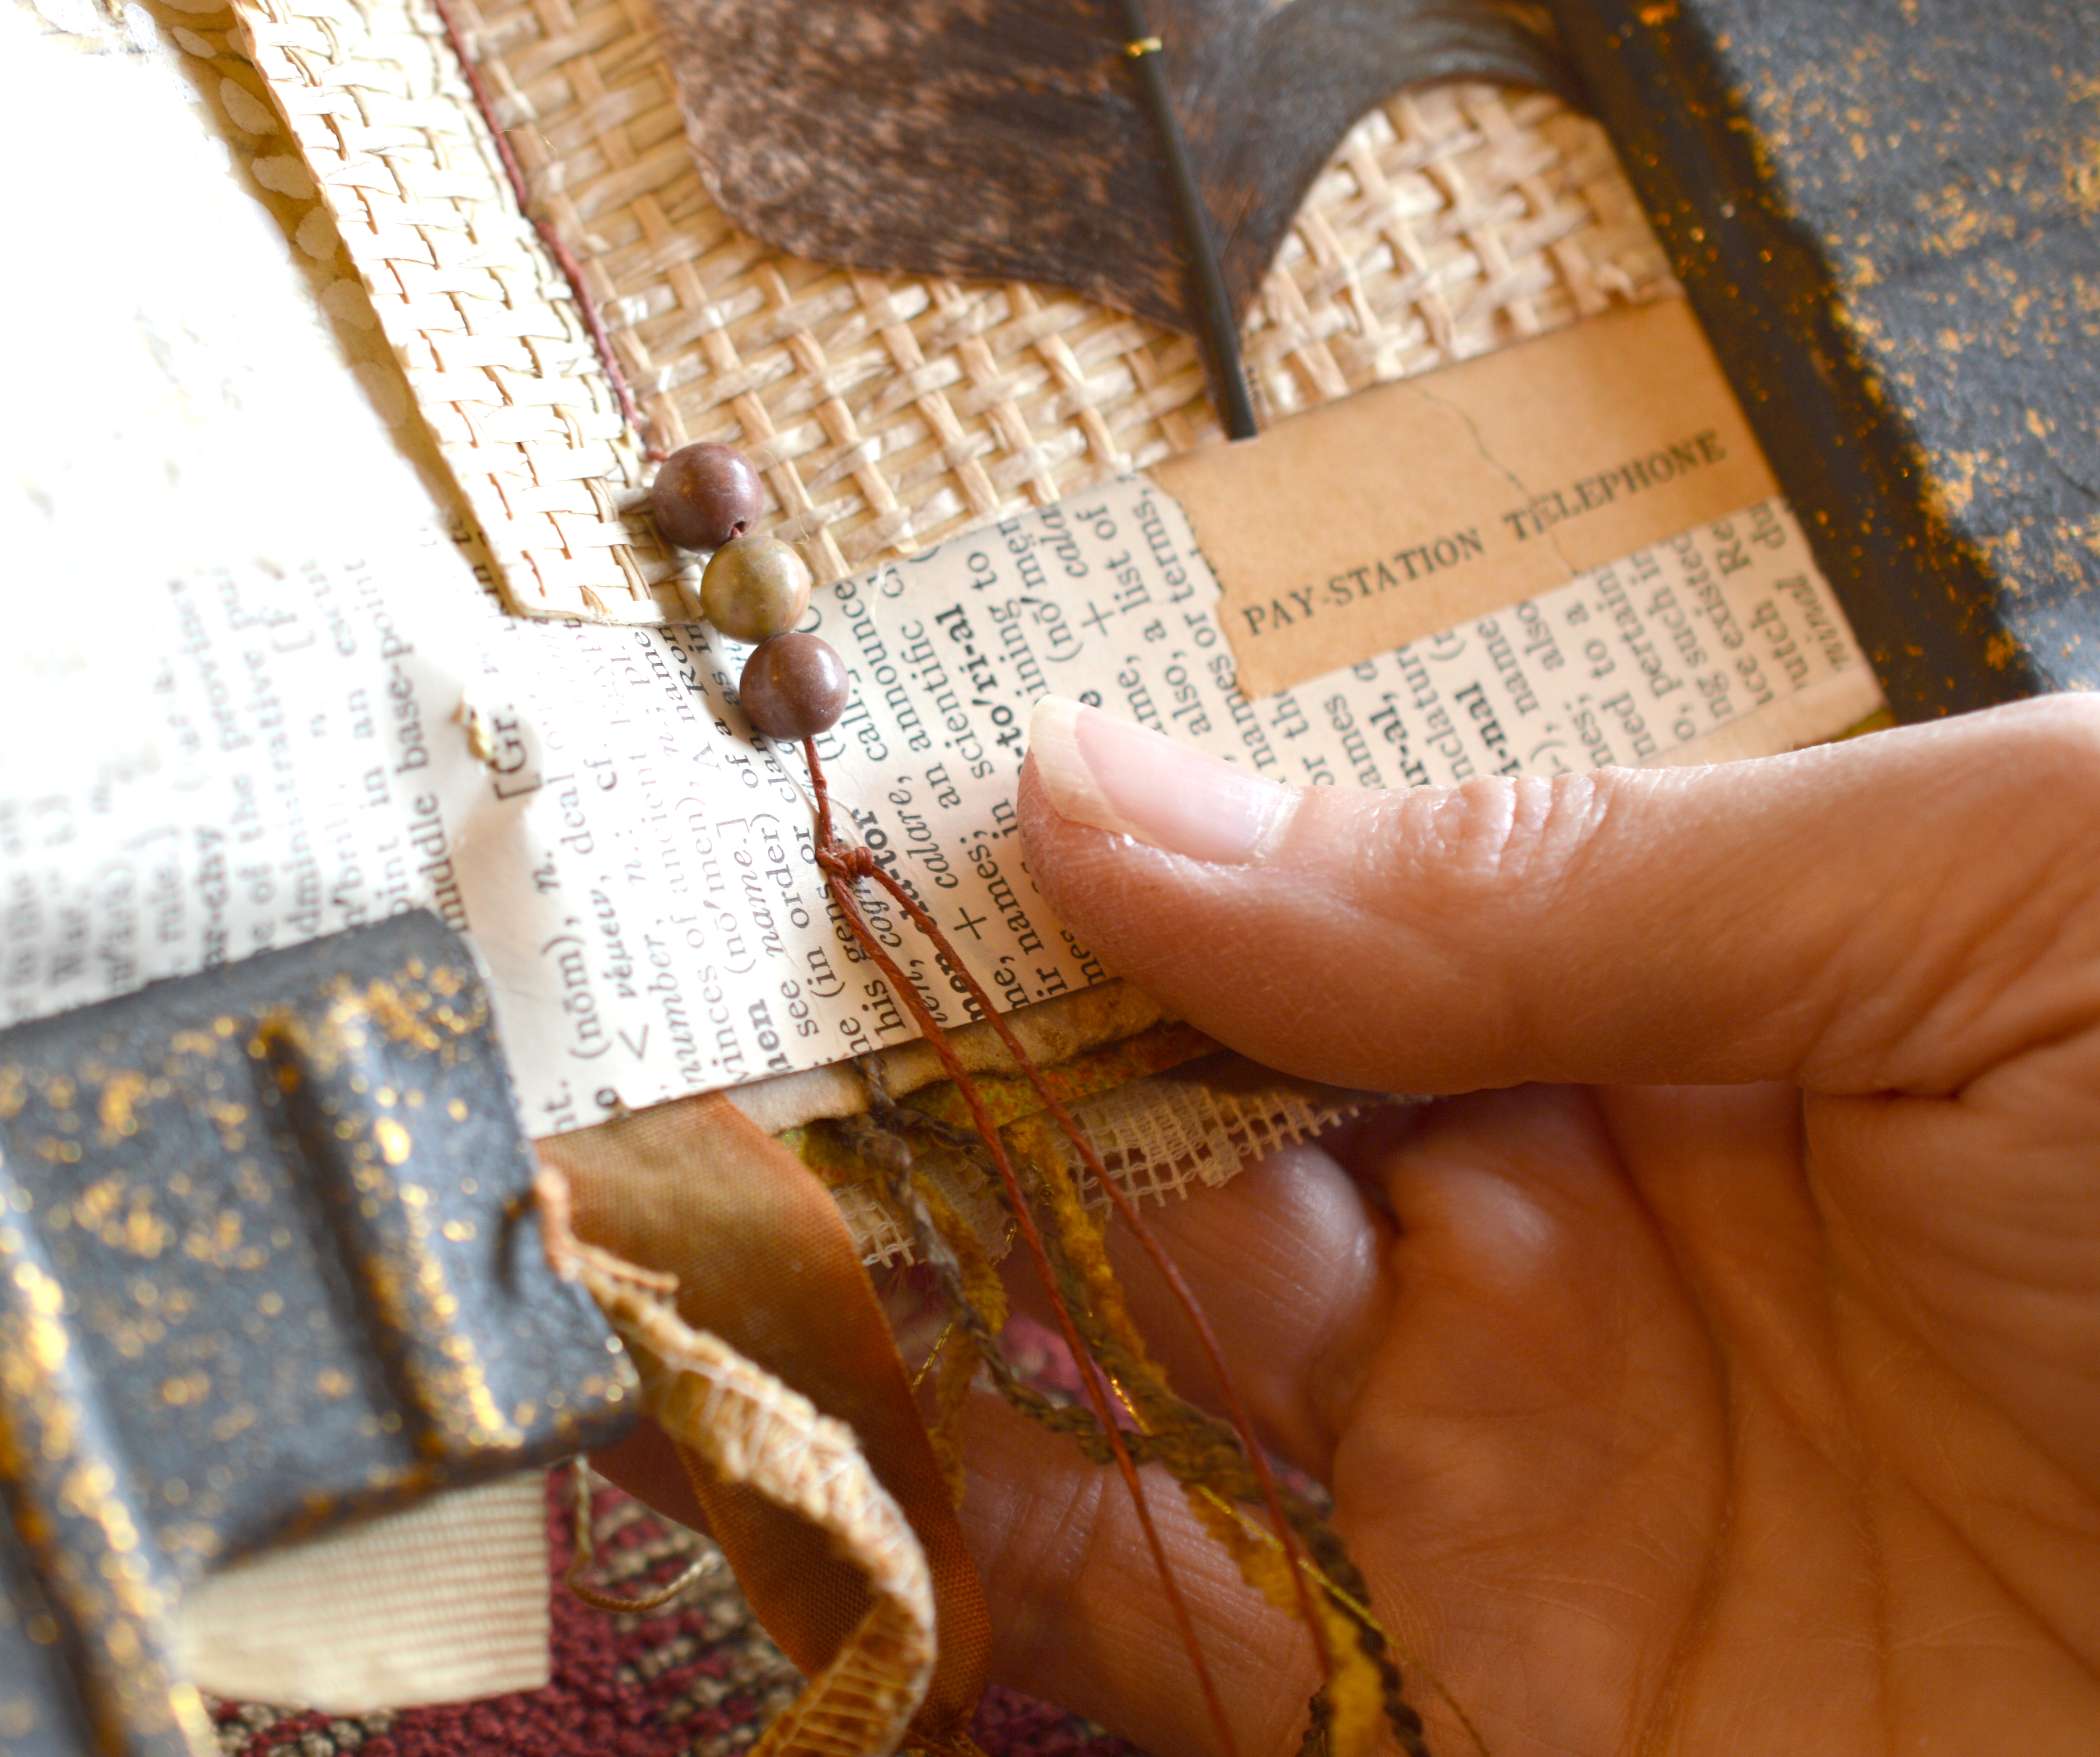
So, because I typically subscribe to the More is More, or More is Better, philosophy, I like to add beads or charms to the bottom of my binding. Not everyone will see it, but whoever spends time looking through each page, will be rewarded with seeing each special detail. I simply slip on a favorite bead…ok, maybe three beads, and I tie the front and the back tail together using a square knot…right over left and left over right…to safely end the binding.
What I like about the Pamphlet Stitch, is that it Allows for all of my Mixed Media additions. It makes it possible for those of us that like to add lots of found objects, to our pages. I like to say that I’m not done, unit my book won’t close !
I also like how the Pamphlet Stitch will let the pages fall open to something different, each time I open the book.

I hope that you will give this Very Easy Book Binding Technique a try on your next book. Whether you use two holes or twenty, it’s an effective method, that I think you will fall in love with ! You can save the complicated bindings, for another time ; )
Thanks for stopping by, Hastypearl.
There’s always something going on and I love sharing with you.
I hope that you will sign up to get a little e-notice from me, that I have posted. You can do that over on the right side of the page.
Best as always…Laura aka hastypearl

6 thoughts on “Easy Book Binding Technique Hastypearl”
Comments are closed.
So talented!
Your small check is in the mail 😉 Laura
Great Tutorial and beautuful pics as Always, laura!
Many thanks, Kim…sharer of many great things! I appreciate your encourager, Heart…: ) Laura
Love your book and the tutorial. Thanks for sharing♡♡♡
Thanks Jan and so happy that you stopped by! 🙂 Laura